How To Use a Humidifier Effectively for the First Time
If you know how to use a humidifier correctly, you can save yourself and your family from many gulps of dry air, which, by the way, is quite irritating for your airways and lungs.
You would think that everyone would know how to set up a humidifier, but things are never in black and white. Besides, there is no standard, one-size-fits-all humidifier because of our different humidity levels.
Thus, you have to set up your humidifier so that it releases just the right amount of cool mist into your air.
Getting a humidifier that suits your needs is also quite easy if you are aware of the features you want in your unit.
After buying the humidifier of your choice, the next thing many would want to know is how to set it up. Most people, especially beginners, have scanty information on how to get the best from their units.
Having the right information on how to use a humidifier will help you get the most out of it. In addition, it will help you extend its useful life.
In the next few minutes, I will take you through a simple guide on how to use your humidifier for the best results.
Steps for how to use a humidifier correctly

Before you know how to use a humidifier correctly, do not plug it in just yet!
1. Read the user manual
Before using any appliance, it is always recommended that you keenly go through the user manual. This is not in any way different from humidifiers.
Always remember that these units come in all manner of designs and styles; each with its own set of instructions.
The manual contains useful information on how to use and carry out routine maintenance on your humidifier.
Always ensure that you thoroughly go through the manufacturer’s instructions and adhere to them. Having used a humidifier before does not in any way exempt you from reading the manual again in case you purchase a new unit.
Never assume that a particular model’s instructions could be similar to those of another unit that you have used before.
Do not throw the manual away as you can refer to it in the future in case you forget some crucial instructions.
2. Assemble your unit if need be
The next thing you need to do is assemble your humidifier if your model requires you to put it together first.
Assembling a humidifier is not such a hard task, especially with the help of the manufacturer’s guide.
If the unit requires assembly first, the manual contains a step-by-step guide on how to go about it. In most cases, the assembly involves simple tasks such as attaching the wheels to help with mobility among other basic things.
3. Cleaning the water tank
After assembling your unit, cleaning the water reservoir is the next step for how to use a humidifier.
When you buy your humidifier, do not assume that it comes with a totally clean water reservoir. Instead, wash the tank first with clean soapy water to get rid of any impurities that could have been left in the manufacturing process.
If you don’t do this, you might be risking inhaling dangerous residues when you finally run your humidifier. Cleaning the reservoir is very easy.
You only need to remove it from the unit, wash it with water and mild soap, and rinse it thoroughly over running water.
4. Fill the reservoir with water
Now that the water reservoir is clean, it is time to fill her up with clean water. While some models allow you to use tap water, using distilled water instead is the best option.
The reason for this is that distilled water does not contain contaminants that are usually present in tap water.
Unfiltered tap water might not only contain bacteria but also some hard minerals. The hard minerals when released into the air form a fine dust, which when breathed in can be very dangerous.
It is vital to know to use an ultrasonic cool mist humidifier. It is notorious for causing white dust.
When filling the reservoir, look for the labeled watermark first, and do not add water past the line. If you must add a filter to the water, this is the right time to do so.
5. Setting the humidifier in the right position
If you have correctly executed the above steps, your humidifier should now be ready to run. One more thing … if you are learning how to use a humidifier, find out about setting it up in the right position.
By this time I am sure that you have already decided on the most ideal room that you want to put it.
If you are not so familiar with humidifiers, these tips will help you position your unit in the best possible position:
- Place your humidifier on a flat raised surface
- Your ideal flat raised surface should be high enough
- The surface should have nothing beneath it
- Leave a space of not less than 12 inches between the humidifier and the wall
- Avoid putting your humidifier near curtains or papers or any other thing that might be dampened by the moisture.
6. Power your unit and adjust the settings
At this point, you should now plug your humidifier into the power and turn it on.
Most of the humidifiers come with knobs or buttons that help you alter or adjust the settings to your ideal preference.
If you are not sure of how to adjust the settings, always go back to the manufacturer’s manual for clarification.
If your model has a special compartment that allows you to add medicinal stuff or essential oils, now is the time to add such. However, if your model does not directly allow you to do so, avoid adding them.
When setting up the humidity level, ensure you set it somewhere between 30-50% since this is the recommended level.
In addition, always remember to switch off your humidifier when not in use and never leave it on in an empty room.
7. Give regular maintenance on your humidifier
Just like any other appliance, your humidifier needs to be taken good care of for it to perform optimally and last long.
Knowing how to maintain a humidifier is one of the ways on how to clean a humidifier correctly.
Here is how to go about it:
Clean the humidifier
The first one is keeping your humidifier as clean as possible. By failing to do so, you risk spreading bacteria, mildew and mold that are potentially harmful into your air.
A dirty humidifier releases a mist that is loaded with such pathogens, which can cause lung problems and other respiratory infections.
A majority of humidifiers come with a set of cleaning instructions recommended by the manufacturer. If your model comes with such, ensure that you always follow them.

In case yours does not come with a cleaning guide; follow EPA’s instructions that recommend cleaning your unit after every three days.
Unplug the humidifier first
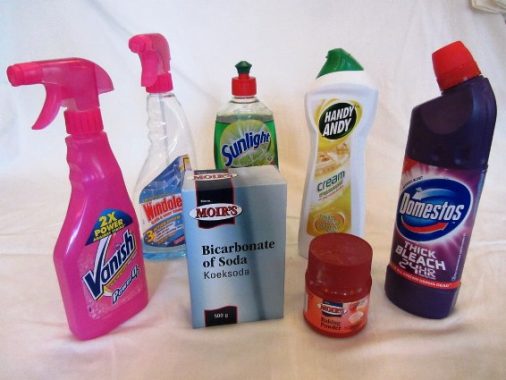
Before you begin cleaning your unit, always unplug it from the power first. After unplugging it, empty the reservoir and thoroughly clean the inner surface using a brush, clean water, and mild soap.
To kill any bacteria present, you can add some vinegar to the water. Ensure there are no mineral traces left in the tank.
Rinse it thoroughly with clean water before wiping it dry. If your model has filters, clean them too or replace them as needed.
The other important maintenance practice is emptying and refilling the tank daily. Never allow the water in your humidifier to sit for too long.
This is because standing water becomes a good breeding ground for mold and bacteria.
If you refill your humidifier and the water is not depleted the following day, empty what is left and refill with clean filtered water.
Only plug in the humidifier when it is in use
The last key maintenance practice is always unplugging your humidifier from the power source when not in use.
If you want to keep it away for some time, empty and dry the tank before storing it in a clean dry place.
The above are the main steps and tips to follow for beginners who want to know how to use a humidifier.
If you follow them to the letter, you will enjoy using your humidifier because it will be such an easy task. Nevertheless, there are a few things that some users ignore, which is not good.
Here they are; ensure that you entirely avoid them while using your mister.
Mistakes to avoid when using humidifiers
As much as you would like to know how to use a humidifier correctly for the best results, you also need to know what mistakes to avoid.
Remember, the more you understand your humidifier and what it can do, the longer it is going to serve you.
1. Paying no attention to the humidity level in your home
You should never overlook the moisture level in your home, especially if you are prone to allergies.
The reason for this is that the humidity level in your space can either relieve or aggravate your allergy symptoms.
Most of the humidifier models come with an inbuilt humidistat, which makes it really easy for you to monitor the humidity content in your air.
If your model does not come with this feature, you can buy a separate humidity meter known as a hygrometer.
The Environmental Protection Agency recommends that you maintain moisture content in your home below 60 percent during summer and between 25 to 40 percent during winter.
2. Allowing the humidity levels to rise too high
Dry air is not good for your health and skin and so is overly humid air. Always keep your home’s humidity at an optimal level (between 35%-45%) for the overall good of everyone’s health.
Too much moisture in the air encourages the growth of mold, mildew, and bacteria, which are all harmful to your health.
It is not too hard to keep your indoor humidity at the recommended levels. Once you have set the humidifier, it will shut off automatically as soon as the humidity reaches the set level.
3. Other mistakes
As already mentioned earlier these are some of the other common mistakes that humidifier users make:
- Neglecting to clean their units regularly
- Allowing water to sit in the humidifier for too long (more than one day)
- Using tap water instead of distilled or filtered water
Conclusion
With this information, I am sure that you have learned how to use a humidifier correctly. You have also seen how to maintain your unit.
Now, you can enjoy high-quality air in your living space courtesy of these life-saving appliances.
When buying one, make sure you do not buy the ones that are sold too cheaply as they may lack some features.
Look at the features first before you look at the price. That way, you will be paying for actual features.

