What is a Humidifier Pad for, and Where Is It?
Humidifiers add moisture to the air, helping to alleviate various health and comfort issues caused by low humidity levels.
This is also a complex appliance with many parts. One of the key components is the humidifier pad, which plays a crucial role in the unit’s effectiveness.
But do you know what it is and where it is located?
Keep reading as we look at these and more details, such as how to clean and replace it and why it is essential for the humidifier’s performance.
Please note: We are not talking about the Vicks humidifier scent pads. These are wicking pads.
What is a humidifier pad, and where is it?
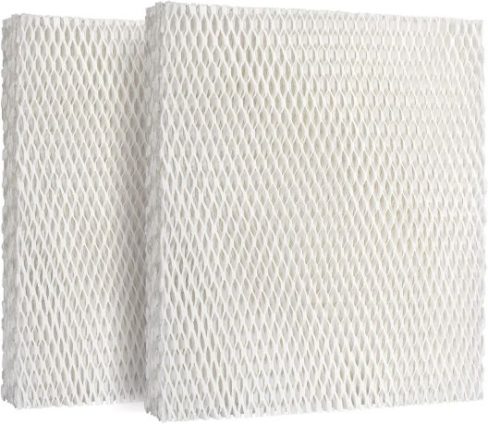
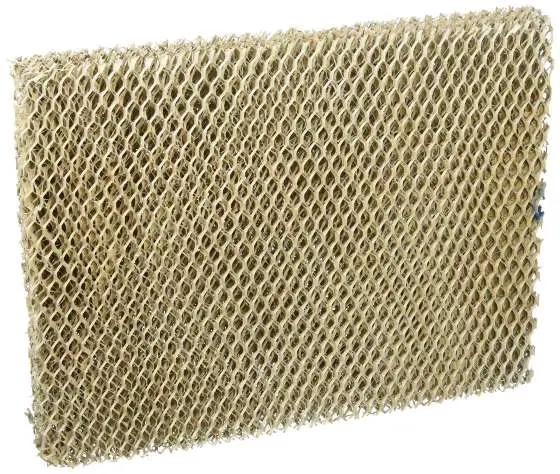
A humidifier pad is also referred to as a filter or wick. The component is found in many types of humidifiers.
This filter wick is usually installed close to the humidifier’s water tank or below it. This enables it to soak up moisture, which is then blown away by the fans and released into the air as mist. Please note that the location of the pad will differ from one humidifier model to another.
Mostly, it is the evaporative humidifiers such as the Vornado EV100 that you can buy on Amazon.com that come with these types of pads.
This pad is typically made of a porous material, often resembling a sponge or an absorbent cloth. This is what helps it absorb water from the humidifier’s reservoir.
As air from the room is blown over the moistened pad, it picks up moisture, raising the humidity level in the surrounding area.
The design and material of the pads vary depending on the type and brand of the humidifier. However, their fundamental purpose remains the same: to disperse moisture into the air.
What does it do?
The primary function of a humidification pad is to facilitate the humidification process. It simply works by absorbing water.
When it becomes moist with water, it makes it possible for the humidifier’s fan or ultrasonic technology to disperse into the air as a fine mist.
This mist helps raise the humidity levels in the room, providing several benefits:
Improved comfort: Maintaining proper humidity levels in your living space can prevent dry skin, itchy eyes, and respiratory issues. The excessively dry air indoors causes all of these problems.
Health benefits: Adequate humidity can help reduce the risk of infections. Remember, viruses and bacteria are less likely to thrive in a properly humidified environment. It also aids in relieving the symptoms of respiratory conditions like asthma and allergies.
Protecting furnishings: Dry air can cause wood furniture to crack, paint to peel, and musical instruments to go out of tune. A properly working humidifier helps to maintain the right moisture balance to protect your belongings.
Energy efficiency: Properly humidified air feels warmer. This allows you to lower your thermostat in the winter, save energy, and reduce heating costs.
Better sleep: Balanced humidity levels can enhance sleep quality. It does this by preventing throat and nasal discomfort, reducing snoring, and improving overall sleep comfort. With a humidifier, you can avoid the problems of sleeping in a dry bedroom.
Can you clean a humidifier pad? And how
Yes, you can clean this important component. This is a good practice for the hygiene and safety of your indoor air. Whatever microbes may lodge on the pad will be blown out with the mist, and then you will inhale them.
Over time, mineral deposits, mold, and bacteria can accumulate on the pad’s surface. This potentially lowers its efficiency and air quality.
Here’s the simple process for cleaning the pad:
Turn Off and Unplug: Always ensure the humidifier is turned off and unplugged before attempting to clean it. Safety should be a top priority.
Remove the pad: Locate the humidifier pad inside the unit. It’s often near the fan or at the bottom of the water reservoir. Carefully remove it, taking note of its orientation, as you’ll need to place it back the same way.
Rinse: Gently rinse the pad with warm water. Don’t use soap or harsh chemicals. They can leave residues that are harmful when released into the air.
Soak the pad: To remove mineral deposits or stubborn residue, soak the pad in a mixture of equal parts white vinegar and water for around 30 minutes. Rinse it thoroughly with clean water afterward.
Air-dry the pad on a rack: Allow the pad to air dry completely before reassembling it in the humidifier. This step is crucial to prevent mold growth in the pad.
Reassemble: Once the pad is dry, reinsert it into the humidifier, making sure it’s correctly oriented, and reassemble the unit.
Regular maintenance like this will help extend the life of the pad and ensure it functions efficiently all the time.
How do you remove the pad?
Removing the pad from the humidifier is a straightforward process. Here’s a step-by-step guide:
Turn the unit off, unplug it, and let it cool down: You should never do any repair, refilling, or cleaning work on the humidifier until you turn it off, unplug it, and let it cool down, for your safety.
Locate the pad: The pad is typically located inside the humidifier, either near the fan or at the bottom of the water reservoir. Open the humidifier or remove any covers to access it.
Detach the pad: Gently remove it from its housing. Be cautious to avoid damaging or tearing it during the removal process.
Note the orientation: Take note of the pad’s orientation if it isn’t symmetrical. You’ll need to insert it back the same way. You can take a photo or a video of the pad in place so that you know how to return it correctly.
Clean it following the process that we discussed in the section before this one.
How to change a humidifier pad
With time, the humidifier wick becomes excessively dirty or damaged, or it starts to show signs of wear and tear. When that happens, it is time to replace it.
Of course, the first step is to order the pads. For instance, if you have a Honeywell Tower humidifier, you can order the Lemige 4 Pack Humidifier Wicking HFT600 Filters from Amazon.com.
Then you can follow the steps below:
Turn off and unplug: As usual, this is the very first step to any repair, cleaning, or replacement job on any humidifier.
Access the pad: Remove the water tank, and if necessary, disassemble the humidifier or remove any covers to access the wick.
Remove the old pad: Take out the old pad carefully. If it’s disposable, simply discard it. If it’s reusable, you can clean it as previously described. However, if it’s worn out, it’s best to replace it with a new one.
Insert the new pad: If you have a new humidifier filter, insert it into the humidifier’s designated slot. You can then reassemble the unit, ensuring all components are securely attached.
Plug the unit in and turn it on: After reassembling, plug in the humidifier and turn it on. The new filter pad will begin to work immediately, raising the air moisture level.
Conclusion
The humidifier pad is also the wick or filter. It absorbs water, which is then blown out into the room in tiny droplets, which form a mist.
To know where the one in your humidifier is located, refer to the humidifier instructions manual. It is also good to clean it in good time.
If you use your portable humidifier almost every day of the week, you should clean the unit at least once a week and check the pad while you are at it.
Knowing where it is located makes the cleaning, and/or replacing task easy for you.